Time for some painting!
Because I'm still waiting for engine parts I decided to kill time with some experimental painting on the Volvo body.
The Volvo122S really needs a paint job. The original paint has faded, is cracked and on the hood and roof it's even flaking. On some spots you can see the bare metal and there's a lot of surface rust.
Because I didn't know what should be the best way to get rid of the old paint I tried several things. I used the right front panel as my test panel.
 |
| Original paint on the hood, a lot of surface rust... |
- A wire brush on the drill - to slow
- A grit 80 sanding disc with the angle grinder - to aggressive but you can use it for areas with surface rust
- Chemical with paint stripper - is OK but not as fast as I taught it would be
- Finally I got the fender back to bare metal with a combination of paint stripper and the wire brush drill
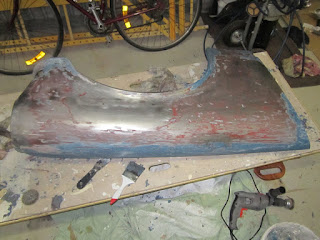 |
| Almost bare metal Volvo 122S fender |
Next step was to prime the fender. I tried rolling on
Dupont 2K high solids primer (1040R). This primer is suitable as an enamel undercoat/primer (who cares??... well.. read on ;) ) It's very smooth to roll but you'll get more orange peel than with spraying. So I sanded it back and applied a second and third coat with a simple 1.8 mm spray gun, much better. When I'm gonna prime the whole car I'll use a Dupont surfacer under the primer but for now this will do.
The next day I sanded the primer with 240, 360 (dry) and 400 (wet) grit.
 |
| After 3 coats of Dupont 1040R primer, before sanding |
Now it was time for some painting. I got some quotes for spray painting... 8000-10.000 dollar for a real good job, (including engine bay, boot and interior) and still 4000-5000 for a quick job. Hmmm... what are the other possibilities...
I started searching the Internet and read a lot about painting your car with.... a roller...
Well, as I was still experimenting with the fender I bought some paint at Bunnings. I chose White Knight Epoxy enamel because that was the only paint that could be custom colour mixed. The mixed colour wasn't an exact match with the original blue (Volvo 99) colour but good enough for the experiment. I mixed the paint with 25% Penetrol and 20% turps. It rolled on pretty smooth but there was way to much orange peel. I also discovered that this paint wasn't UV stable. Time for a different brand.
International Toplac.
This is original oil based yacht paint, high gloss, durable and UV-resistant. The only problem was that this paint only comes in ca 12 colours. As I wanted an exact match with the original Mediterranean blue colour I bought 3 different colours of Interlux
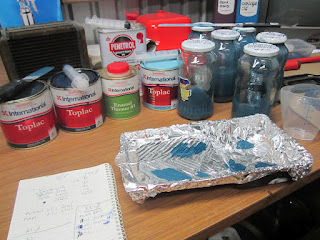
Toplac and started mixing them (Oxford blue, Squall blue en Donegal green). I used a glass jar and 5 25 ml syringes and wrote down how much I used from each colour.I worked in 1 ml steps at a time. After an hour or so I found the exact match fort the 100% paint mix. But.. what's the ORIGINAL colour...The Volvo came with the radio cover wrapped in a newspaper from December 5 1970, so that's the real non faded colour.
Then I added 25% Penetrol and 25% Mineral turps. The colour changed a little bit, but still very very close to the original 99 colour.
 |
| Radio cover Volvo 122S 1969 - Original paint and colour |
 |
| Ingredients and tools for the Toplac paint mix |
Roll it on.
To apply the paint I used a 10 cm foam roller with a round top. To keep the paint tray clean just put in a new piece of aluminium foil after each coat. The trick is to keep the coats as thin as possible, so squeeze out the roller before it hits the body. It was obvious that the Toplac is a much better paint which flows better, has more gloss and less orange peel.
According to several stories on Internet it takes between 6 and 10 coats to get a good result. And sanding between each or second coat is also necessary. I sanded the previous coat with 400 (
because it had a lot of orange peel from the White knight paint) and then 800(wet) . Now waiting for the results, will the colour be the same when it's dry...
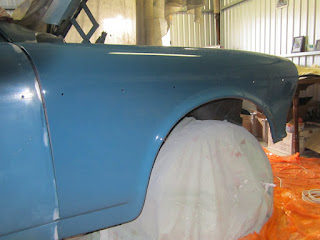 |
First coat of Toplac mix (underground was already blue from the previousWhite Knight experiment)
now waiting for the results... |
Update 15-7:
It's looking good both the colour match and the quality, almost no orange peel. I just sanded it back with 800 wet and applied the next coat.

