Aug 31, 2014

Replacing the old SEV Motorola alternator

The original alternator in the Volvo 122S in 1969 was a SEV Motorola 30 Amp one with an external regulator. When I rebuilt the engine I just cleaned it and refitted it. But I noticed after a while it couldn't really keep up with the power usage and the new battery was getting weaker. The alternator wasn't broken but I think it needed new brushes.

Motorola alternator 30 Amp Volvo Amazon P130
SEV Motorola alternator 30 Amp Volvo 122S

Wired Motorola alternator 30 Amp Volvo Amazon

Instead of rebuilding the Motorola alternator I decided to get a new stronger one. Also because I didn't like the fact that the little red amp light in the dash was always glowing a bit when driving with the lights or fan switched on.

Little red AMP light in dashboard Volvo Amazon
Little red AMP light in dashboard Volvo 122S

When I took out the old Motorola alternator I only disconnected the external voltage regulator instead of taking it out..keeping the original look.

Disconnected Voltage regulator Volvo Amazon 1969
Disconnected Voltage regulator Volvo 122S 1969

The new (SCG) Alternator has an internal voltage regulator so it's easy to connect.


Installation instructions SCG 55 AMP alternator Volvo 122S B20 engine
Installation instructions SCG 55 AMP alternator
I also used an extra negative wire as mentioned in the instructions, just to make sure it has a proper earth connection.


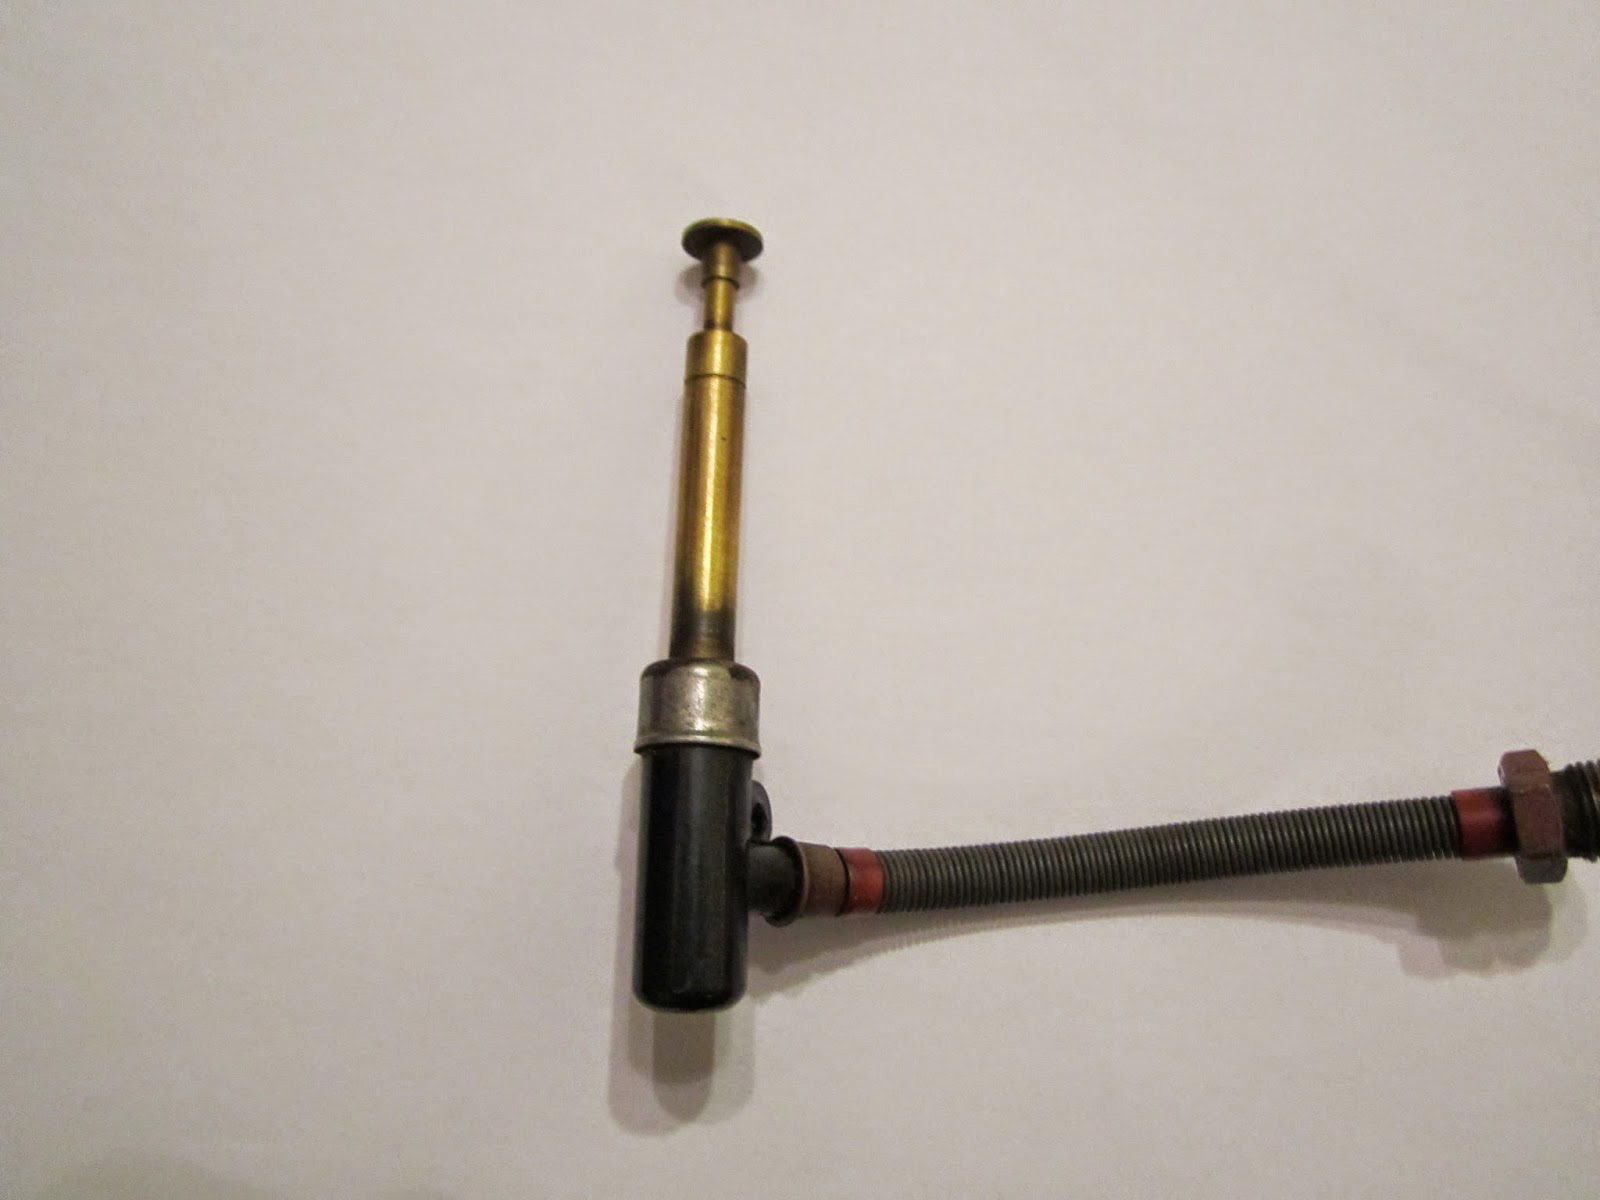
New SCG alternator connections
The black round part at the bottom is the voltage regulator

New SCG alternator Volvo B20 engine

Factory test results 12V/55A SCG Alternator Volvo 122S B20 engine
Factory test results 12V/55A SCG Alternator
As you can see in the factory test results the alternator starts working at 1534 rpm (alternator rpm and not your engine rpm which is lower). Right click on an image to open it in a new window for max(100%) view.
I measured the alternator pulley diameter and the waterpump pulley diameter in order to calculate pulley ratio.

Alternator pulley approx. 74 mm
Waterpump pulley approx. 128 mm
Pulley ratio in my B20 engine: 128/74 = 1.73
The alternator starts working at 1534 rpm --> engine ca. 887 rpm (1534/1.73 = 887)
The B20 engine in my 122S is idling around 900-950 rpm, according to the factory test results the AMP output at idling speed is around 31-35 A, which is already more then the max output of the old Motorola alternator.

New alternator installed Volvo 122S B20 engine
New alternator installed 


Jul 26, 2014

Dyno - Machining the SU carb needles

Because the rebuild Volvo B20B engine has undergone some modifications the SU HS6  carbies probably need other needles. Although the engine was running OK I felt it wasn't always as powerful and smooth as it could be.

But what's the right needle to get the maximum out of your modified engine? There are over 260 different needles for the SU carbies.

SU needle dimensions and stations - page 1

SU needle dimensions and stations - page 2

SU needle dimensions and stations - page 3

SU needle dimensions and stations - page 4

SU needle dimensions and stations - page 5

SU needle dimensions and stations - page 6

SU needle dimensions and stations - page 7

And there's a real possibility that the right needle for your modified engine even doesn't exist. So in order to find the right one I'm gonna buy them all and try each and everyone of them...hahaha  No, there's an easier and quicker method to get your tailor made needles.

DYNO-tuning!

First some info about the optimum Air-Fuel-Ratio (AFR) and carbie needles.

AFR
Theoretical the optimal air to fuel ratio is 14.7:1 (determined for pure gasoline). But as most petrols have varying properties and additives it is commonly accepted that most engines respond to an AFR somewhere between 12.5 to 13.2 parts air to every one part of fuel.

Carburetor needles
If you take a closer look at a SU needle you'll see it is getting thinner at the end. When the engine is idling the needle is almost all the way in the jet. The jet opening is almost closed and only a small amount of fuel can pass the opening between the needle and jet.

SU needle and jet Volvo 122S
SU needle and jet (with attached fuel line)

Volvo 122S carburetor Needle in Idle position
Needle in idle position

If you rev the engine the carb will lift the needle which will allow more petrol passing the opening because the needle is thinner at that point.

Volvo Amazon carburetor Needle in Cruise position
Needle in Cruise position

SU Needle full trottle , see the bigger opening of the jet
Needle almost full throttle , see the bigger jet opening

SU needles are divided in stations. Normally around 16 stations. Sizes are taken and calibrated every 1/8 inch (ca 0.3175 cm) from top shoulder. The thinner the needle at a station is the richer the mixture will be at that specific rev point.

SU - KN needle with 16 stations - Volvo Amazon
SU - KN needle with 16 stations

Sooo... to create the perfect needle you have to measure the AFR at every station of the needle and a Dyno is the perfect tool to do this.

When you wanna do this make sure you have a near new needle and jet. Now it's a matter of fine tuning your needle.

With the first Dyno results you know the AFR at every Station and you'll see it isn't always within the 12.5 to 13.2 range. Every station that shows a leaner mixture (>13.2) will be machined/filed. This isn't a job you can do yourself, unless you have the right tools and really know what you're doing.

AFR with different speeds - SU HS6 twin carbies - Volvo Amazon
AFR at different speeds

The NGK BP7HS Spark plugs were also replaced with 2 points hotter spark plugs; BP5HS. In summer I'll probably replace them with 1 point colder ones; BP6HS. The problem with the BP7HS was they weren't getting hot enough (it's winter here at the moment) to burn all the carbon of resulting in a black insulator nose with a weaker spark.

After machining the lean stations and replacing the spark plugs the Amazon is now running super smooth over the whole rpm range of the B20B engine. Still running in so I have to be careful not to floor it, still a couple of hundred miles to go before I can redline the Amazon...


Test drive after dyno tuning


This time 3 bonus pics, made this afternoon when I was replacing the exhaust of a Saab 900 turbo.

Classic Saab 900 Turbo with Simons sport exhaust

Toolbox guard

So, where's my reward ?
Did you mention the word Schmacko????


Jun 15, 2014

Tie rods and Steering track rods ends replaced

One of the things I still had to do was replacing the tie rods and steering track rod ends. When I checked their ball joints when I was rebuilding the front axle they felt ok., no measurable play. But after driving the Amazon for a couple of 100 miles I got the idea the steering wheel wasn't connected at all... aquaplaning when it hasn't rained a drop for weeks... excessive play and getting worse every mile.

The right way to check the ball joints of the rods is to get big pliers and grab the joint; if they're ok it isn't possible to press the bolt in. I must admit the first time I checked them I did it with my bare hands, no brainwave, no pliers.. stupid me....
I checked the ball joints of the rods again and there was a ridiculous amount of play. No need for pliers this time, the weight of an ant was enough to show the play...
When I checked them the first time they were probably filled with rust and old grease giving the same feel as a new one.

Exessive play, most obvious around 54 seconds

 Time for new rods!

I started with the Steering rod . I used a ball joint splitter to get the track rod ends out of the arms. Then I measured the overall length so the toe in would stay the same (well...I hoped it would stay the same..).

Left steering track rod end Volvo Amazon
Left steering track rod end Volvo 122S

Steering rod Volvo 122S
Steering rod Volvo Amazon

Steering rod removed Volvo 122S


The steering track rod ends are different on each side. On the left hand side (seen from sitting in the car) the thread is opposite of what you are used to. The right one has a normal thread. This will give you the possibility to turn the steering rod and thus in- or decrease the toe-in. Turning the steering rod in the same direction as the wheels when driving forward will  increase the toe-in, turning the steering rod the other way will decrease the toe in.

Steering track rods old and new Volvo 122S


Different threads left and right steering track rod ends Vovlo Amazon
Different threads left and right steering track rod ends

After replacing the steering rod ends I started disconnecting the left tie rod. Again using the ball joint splitter.
This replacement  is pretty straight forward and won't take long. I protected the new rims with some rags while splitting the joint.

Splitting the tie rod joints Volvo 122S
Splitting the tie rod joints

Protecting the GT rims while splitting the tie rod joint Volvo 122S
Protecting the GT rims while splitting the tie rod joint

With the tie rods you also have a left (L) and a right (R) side one. 

Left (L) and (R) tie rod Volvo 122S

As can be seen in the previous pics, the castle nuts with split pen were replaced with nyloc nuts. When I tried to tighten the nuts the "bolt" from the joint started to turn, making it impossible to tighten the nut. So I put a jack underneath the joint and pushed it a bit (not too pressure!) so I could tighten the nyloc nuts with a 37 Newton meter torque.


Pushing the rod in the pitman arm Volvo Amazon
Pushing the rod in the arm

After all the new steering parts were fitted I drove the Volvo to a tyre centre to get a wheel alignment. It's best to do this straight away, otherwise you need new tyres within a couple of thousand miles.

At a wheel alignment they will check and adjust the Camber, Caster and Toe-in.
Camber is angle between the vertical axis of the wheels used for steering and the vertical axis of the car when viewed from front.

Camber
Camber

Caster is the angle created by the steering pivot point from the front to back of the vehicle. Caster is positive if the line is angled forward, and negative if backward.

Caster
Caster


Toe represents the angle derived from pointing the tires inward or outward from a top-down view – much like looking down at your toes and angling them inward or outward.

Toe-in
Toe-in
In the Volvo Greenbooks and Haynes you can find the following specifications:

Camber: 0.5 degrees positive
Caster:  0 - 0.5 degrees
Toe in: 0 -0.4 mm

However to get a better grip I choose for the following specs:

Camber: 0.4 degrees negative
Caster:  1.0 degrees
Toe in: 0.35 mm

Camber and Caster adjusted with shims Volvo Amazon
Camber and Caster adjusted with shims

Toe-in adjusted by turning steering rod Volvo Amazon
Toe-in adjusted by turning steering rod
After the wheel alignment it felt like driving a new car home. Wheel alignment is worth every cent and you'll also save your tyres and rod joints. 

Jun 13, 2014

GT wheels Volvo 122S

It's a matter of taste but I've always loved the GT rims on the Volvo 122S. So when the Amazon was almost ready I started the hunt for 4 steel GT wheels. Second hand ones are  hard to find and expensive. Luckily there are reproduction GT wheels for sale. But be careful! There are good and bad repro GT wheels.

You can recognise the good ones: they will have a TUV label. This label will assure the quality of the rims. The ones I bought were made in Denmark.

TUV-label GT wheels Volvo 122S

When I got the GT wheels I filled the seams with clear coat to keep the rust away. I also treated the surface with A-Glaze for extra protection.

New Volvo GT rims Volvo 122S

New Volvo GT rim Volvo 122S

 Volvo GT wheel Volvo Amazon
 Volvo GT wheel Volvo 122S

 Volvo GT wheel Volvo 122S 5.5 inch
 Volvo GT wheel Volvo 122S 5.5 inch

 Volvo GT wheel Volvo 122S

 Volvo GT wheel Volvo 122S

 Volvo GT wheel Volvo 122S


The Volvo GT wheels have the following specifications:
Type:  613014
Size: 15 x 5.5
Offset:  14 mm
Holes: 5
Colour:  Silver

Tyre choice: Kuhmo KH17  195/65/R15 91H

5.5 inch GT wheel Volvo 122S

5.5 inch GT wheel Volvo 122S
Volvo 122S on the beach