Apr 3, 2013

Little things

Sometimes after a busy day I don't have much time for the Volvo. That's when I take on one of the many little projects.

Cleaning the windshield and rear window
The front- and rear window came out with an edge covered with old hard black sealant. I tried to get rid of it with thinner, sharp knives, aceton, etc, nothing worked.
Then I remembered I still had some paint stripper left which I used on the body of the Volvo 122S. It's a gel, so it's easy to apply. I tried it on a little part, waited for 10-15 minutes and took a blunt scraper.
It worked! The sealant had turned into black butter and I could almost wipe it of with a rag. Watch out with the edge of  your windshield, especially when the edge is a bit crumbly, because the paintstripper may get between the different layers of the glass. When all the sealant was removed I hosed the windows down with water to get rid of the paint stripper.

Windshield Volvo 122S with a lot of hard old black sealant

Paint stripper gel on top of the old hard sealant

Windshield and rear window finally nice and smooth


Fixing the tail lights 
The tail lights looked a bit dull and rusty so I took 'm apart. I cleaned all the parts with hot water and a brush. The rust on the chrome bezels wasn't from the bezels but from the rusty screws. I'm gonna replace them with Stainless steel ones later.

Tail light with bezel

The chrome on the inside of the tail lights was dull or totally gone. Two coats with chrome spray made them look like new. Don't use clear on top of the chrome paint because it will make it look darker and greyish.

Painting the chromed inside of the tail lights - Volvo 122S 1969
Painting the chromed inside of the tail lights.
Right one with a coat of clear on top which I resprayed later

 Chrome sprayed inside of the tail lights - Volvo 122S
Resprayed inside of the tail lights

Tail light with bezel Volvo 122S

Wipers
Before putting back the wiper assembly I wanted to make sure that everything was working like it should be. With some inernet research and tips from my Volvo friends I tested everything on the work bench.

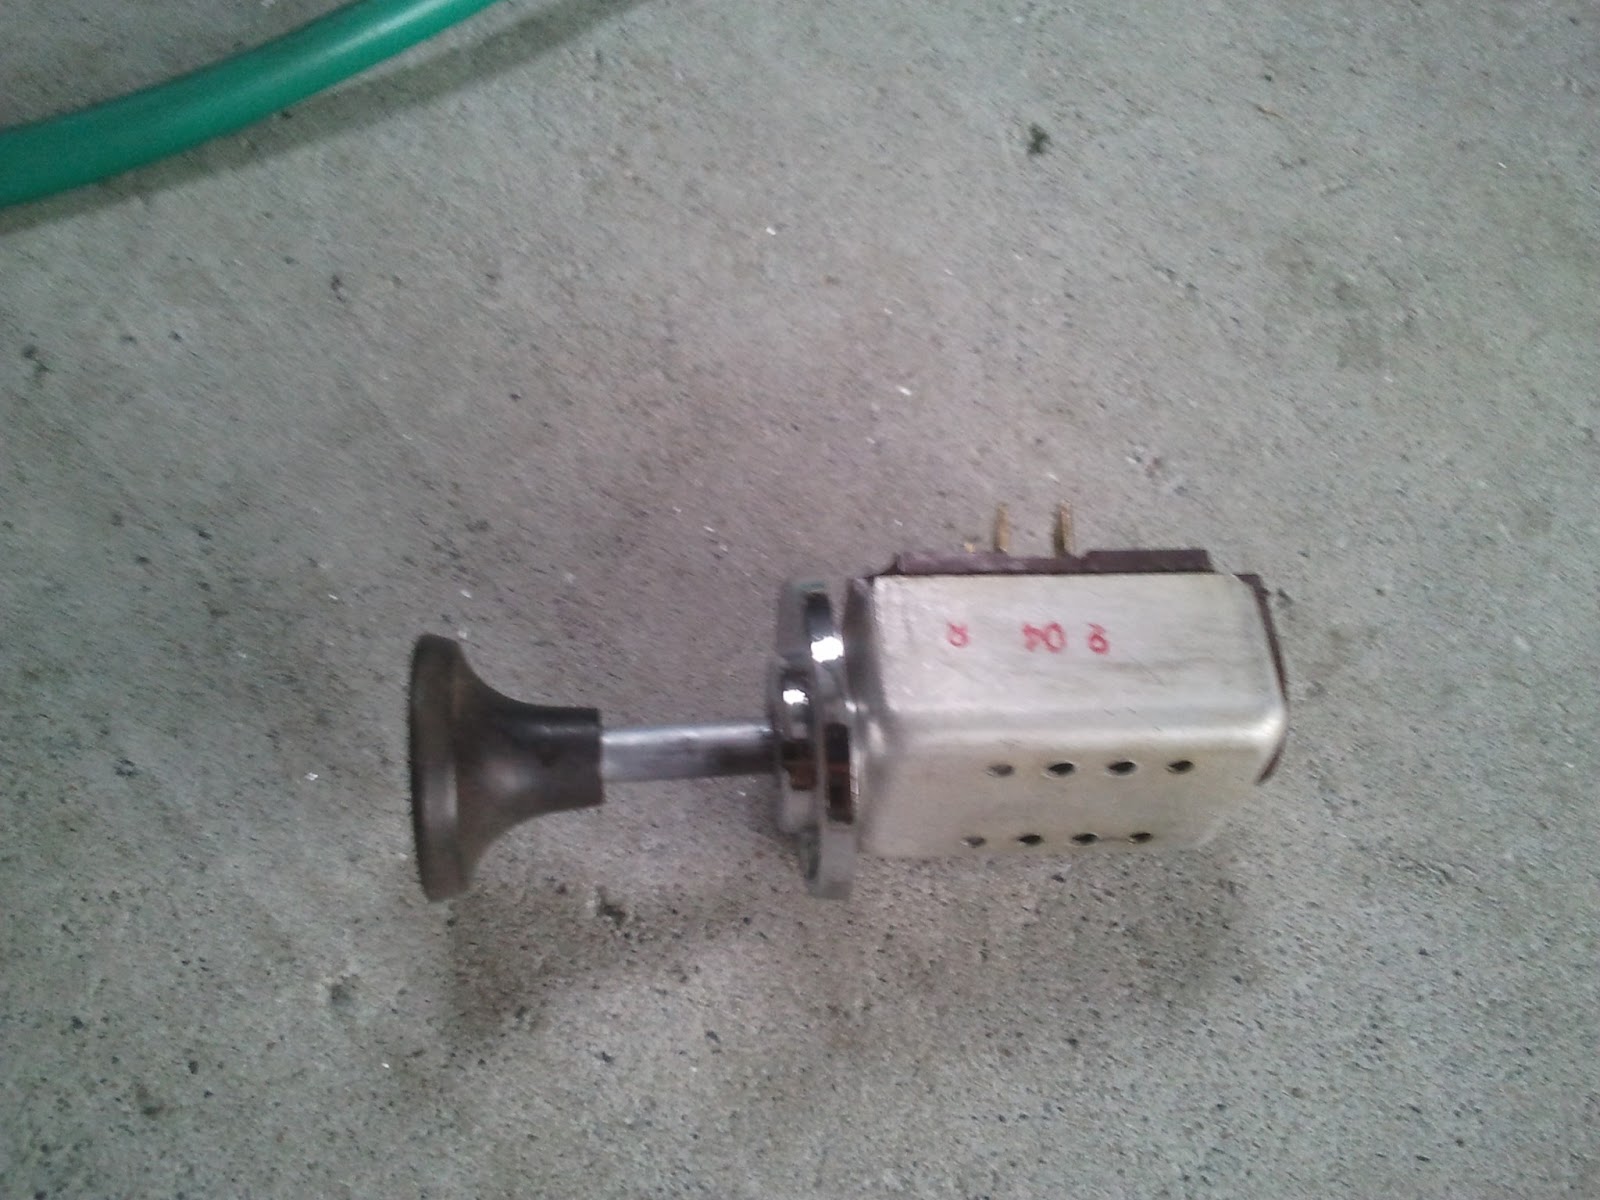
The wiper switch in the dash  has 4 positions; off, slow, fast and fast with washer.

Wiper switch Volvo Amazon 122S
Wiper switch


Wiper switch Volvo 122S has 4 positions
Wiper switch Volvo 122S - see the four  different modes

On the other side of the switch  you'll find 5 pins. 

Wiper switch Volvo 122S with 5 pins

If you take a closer look you'll see a letter next to each pin/connector :
P = green (wiper motor) and + lead from fuse box  to pos. pole battery (I tested without the fuse box  : o )
A = black (wiper motor)
F = red (wiper motor)
W = black (washer motor) (I used a brown lead in the test)
Wiper motor housing and other pin on washer motor are connected to the neg. pole of the battery.

Wiper motor Electrolux Volvo 122S 1969
Wiper motor Electrolux  - Volvo 122S 1969

Testing the wiper assembly - Volvo 122S 1969
Testing the wiper assembly

Everything worked (..of course, it's Volvo..;)

If you want more info about the different Volvo wipers, check http://www.sw-em.com/Windshield%20Wiper%20Systems.htm with lots of detailed info 


Jan 22, 2013

Acrylic Primer filler

After all the seams were sealed I started with the Acrylic Primer Filler from Carmaster (434 Protec). The instructions on the tin were ; Apply product direct from the can without thinning.
That's almost impossible!
I used a spraygun with a 2mm tip and because it looks so thick I thinned the primer with 10% thinner. The mix was still way to thick and sprayed dry. After sanding with 360-400-600 and 800 (wet) grit you could still see the results of the dry spay. It feels real smooth but still looks porous... Time for a thinner coat of primer

Porous structure of the primer

Right door with 3 coats of primer on top of the epoxy primer
Then I mixed the primer with 25-30% thinner and it came out much better, a nice wet coat. If you use less thinner it's more like a porous filler.

Smooth structure of Carmaster 434 primer after extra thinning
Smooth structure of primer after extra thinning

Boot  with 3 coats of sanded primer
Boot  with 3 coats of sanded primer  
When spraying the primer filler the first time I got a lot of dry overspray falling on the freshly painted panels which resulted in a rough surface. Sanding it back with 240 grit and applying a coat of 30%  thinned primer will smoothen the surface.

After the whole body was covered in 3 coats of primer it was time for some sanding. I sanded the bigger "flat"  parts with a Ryobi DA sander (only used the DA for the 400 grit). It's an electric sander with a 5" pad. One of the reasons I bought it was that the orbit was only 2.5 mm which is really good for finishing with 1500-2000 grit the last colour coat just before polishing but the main reason was that my compressor is just to small to feed an air driven DA sander. Don't try to wet sand with an electric sander, if you do you'll get shocking results...

One thing I learned the hard way is never to put your sander on the body when it's already on. It will go through the primer/paint straight away.

Volvo 122S Body in Carmaster 434 Protec primer
Body in high build primer

Volvo 122S sanding the Carmaster 434 primer
Sanding the primer

For all the little corners and curves I used a small piece (ca 2.5x2.5 cm) of sandpaper and sanded it by hand. I also used a flexible rubberblock. Don't sand too hard and do small areas at a time, devide a panel in smaller parts when sanding. Start with 400 grit and if it's still a bit rough sand it lightly with 320-360 grit and then continue with 400-600-800 grit. Just take your time. After 3-4 hours or so I always lost my patience without knowing it and started sanding through. That was my sign to stop . I think I spend all together over a 75 hours sanding the epoxy primer and the high build primer...

Don't try to save on sandpaper. When it's clogged take a new piece otherwise you'll get scratches caused by the build up dust in the sandpaper.
When wet sanding with 600 and 800 grit I used a plant sprayer, wrapped the paper around the flexible soft rubber block and sanded without to much pressure. After sanding a part I went over it with a clean wet rag to take of most of the debris and then dry with a clean dry towel to check the results.

Roof Volvo Amazon after wet sanding with 600 grit
Roof after wet sanding with 600 grit

Wet sanding Volvo Amazon with 600 and 800 grit
Wet sanding  body with 600 and 800 grit
When sanding the whole body I sanded through the high build- and epoxy primer a couple of times, especially in the engine bay with all the curves and hard to reach spots. I think that's inevitable. Just sand everything that has to be sanded and then touch up with epoxy primer. Don't forget to sand the epoxy primer lightly before putting on the colour coat.

After wet sanding primer with 600 grit
Roof after wet sanding primer with 600 grit

Volvo 122S roof - After wet sanding primer with 800 grit
Roof after wet sanding primer with 800 grit


Primer after wet sanding primer with 800 grit
After wet sanding primer with 800 grit - getting glossy


Dec 28, 2012

Seam sealer

One of the most important things to do when you're preparing your car for painting is sealing the seams. Most rust problems will start in seams if not sealed properly.
There're a lot of different types and brands of sealants on the market,
Never, never use a sealant with silicone in it for the simple reason you cannot paint over it.

I tried two brands; Sikaflex 227 and HB Body 115. I put a bead of both of them on an old sunroof and after letting it cure for a day I put it in the scorching sun for a couple of days. They both survived, but in my opinion the HB Body 115 has a better adhesion.

HB Body sealant en Sikaflex 227 sealant
Sealants

Seams sealed in engine bay

Seam sealing bonnet
Seam sealing bonnet

 Within 30 seconds after applying the sealant I dipped my finger in thinner and went over the sealant to smooth it. After all the seams were sealed I let the sealant dry for a couple of days and then brushed over it with epoxy primer.

Dec 19, 2012

Epoxy primer

I intended to use an etch primer and on top of that a HS primer. But as the Volvo was only bare metal on the outside I've heard you can get problems with etch primer going underneath the paint at the edges and it will probably lift the existing paint. Hmm.. what about epoxy primer.. it can be used on as well as bare metal and painted surfaces, doesn't absorb water and it will seal the body too.
I started looking for a epoxy primer which could also be rolled or brushed on. And I found one: 408 Epotec primer surfacer from Protec . It's a polyamide cured Epoxy primer surfacer. On top of the epoxy primer I'll use Carmaster Acrylic Primer filler, also from Protec.

Protec 2K Epoxy primer 408
Protec 2K Epoxy primer


I painted one panel with a mohair roller and brush and sprayed another to see the difference. I used ca. 10% thinner for the rolled-on epoxy mix and ca 20% with the spray epoxy primer. The panel that has been sprayed looks smoother but the rolled-on primer looks pretty good too, there's a little bit orange peel. Next time I'll use more thinner for the rolled-on mix.

Before I could spray the body and all the panels I had to build a spray booth in the shed. I used a couple of cheap plastic dropsheets as walls, masking tape and masking paper on the floor. To get rid of the water in the air I used a water trap ca. 10 m from the compressor. If you put it to close to the compressor it wouldn´t work as all the water is still steam.

Spray booth made of plastic drop sheets
Spray booth

Spray booth made of plastic drop sheets with fan

As flash rust started within minutes after cleaning  I had to sand back every panel. After sanding the roof I applied the first epoxy coat with a roller so I had more time to sand the rest of the body.

Flash rust 15 minutes after cleaning

I hang the doors with octopus straps so I was able to spray all the sides in one go. The protec epoxy primer has a flash time of ca. 10 minutes. That will give you the time to mix some new paint for the second coat. After mixing the epoxy with the hardener and the 202 reducer you have to wait for 10 minutes before you can use it.

Door with two coats epoxy primer

Bonnet in epoxy primer

Body Amazon in 2K epoxy primer

Body 122S in 2K epoxy primer
Body Amazon in 2K epoxy primer

Next thing to do is filling all the dents with bondo. I used U-Pol 0712 Dolphin body filler. It's unbelievable how many little dents showed up when the surface is glossy... especially the bonnet...

Filling the door with Dolphin bondo
Filling, the supervisor is watching..

Half way filling the dents in the bonnet
Half way filling the dents in the bonnet...


Nov 29, 2012

Blasting

After spending almost 15 hours with the grinder I decided to bring the Volvo to a soda blaster.  Because the interior was still good the blaster only blasted the outside of the 122S.

Volvo 122S before soda blasting
Before soda blasting

Volvo 122S after soda blasting
After soda blasting

Soda blasting is better for your car than sand blasting because the soda doesn't damage the underlying metal. The only problem is that the soda doesn't remove all rust. So after the blasting it was time for some more grinding and a chemical treatment. The normal surface rust is easy to remove with the grinder but  the hood, roof and boot where "pitted".
I used phosphoric acid and Rustico to get rid of the rust pits. Not all the rust in the pits was removed by the chemicals but it went soft after the treatment and was easy to remove with the grinder without taking of too much off the healty metal.


Pitted surface of the roof Volvo 122S
Pitted surface of the roof

Boot Volvo 122S removing rust
Boot - Left side done

Boot Volvo 122S rusty pitted surface cleaned
Almost done

Soda  residue will give problems if you don't clean the metal before painting. However if you want to wait a couple of months before painting it's also a perfect rust inhibitor.
After removing the surface rust I started to get rid of all the soda dust in the car, especially inside the chassis. 
And it took alot of time...hours became days....So don't expect to get rid of the hard labour with soda blasting. There's no easy way out :-s
I used compressed air and a vacuum cleaner with a high tec (masking tape ;) attached flexible hose. With the amount of baking soda that came out of the Volvo you could easily bake cakes for the whole neighbourhood..

Cleaning Volvo 122S removing soda from soda blasting
Cleaning the 122S

CLeaning Volvo 122S removing soda from soda blasting
Baking soda everywere

Cleaning Volvo 122S removing soda with flexible hose and vacuum cleaner
Vacuum cleaner with hose extension to clean the chassis 
When all the baking soda was removed I started to clean the bare metal surface of the doors. The blaster told me to wash the car with warm water, add 5% vinegar, to neutralise the soda, then hit it with a pressure washer, then wash again with 5% vinegar water, then pressure wash again and dry immidiately with a blower or rag before flash rust starts. That's the main reason I cleaned one panel at a time instead of the whole car at once.

After cleaning it's best to hit the bare metal with an epoxy primer within 1/2  an hour, otherwise you'll get flash rust again. I didn't because I was still looking for the best epoxy primer. So there will be a little, almost invisible, flash rust on the doors. Luckely it's been very hot (35-40 C) and dry the last couple of days.
Sanding with 120 grit before priming will be neccessary, but it won't take too long.


Nov 8, 2012

Fitting cylinder head

After 13 years and a last inspection of the pistons and bores it was time to fit the cylinder head of the B20B engine. First I fitted the new water pump. The pump came with two sets of rubber rings: 1 set with a height of 8.5 mm and the other one with a height of 9.5 mm. The 8.5 mm rings are for the B20B engine which has a thinner head gasket than the B18 engine.
I lubricated the new tappets inside and out with assembly oil and put them into the bores. Be careful not to drop them in the sump...

New tappets and original pushrods Volvo B20B engine
New tappets and original pushrods

Tappets fitted in their bores Volvo 122S
Tappets fitted in their bores

After the bores and pistons were also lubricated with an overdose of oil the gasket was alined with the bolt holes and the cylinder head was placed on top of it.

Cylinder head gasket alined with bolt holes Volvo 122S
Cylinder head gasket alined with bolt holes

"TOP" is on top of cylinder head gasket Volvo 122S B20
Make sure the word "TOP" is on top :-)

Before that I cleaned and checked all the cylinder bolt holes just by putting in the bolts and made sure they went in all the way.
The cylinder head bolts have to be tightened in a special sequence to the first torque of 39.5 Nm. There will be two more stages of thightening...

Old -  and new cylinder head bolt Volvo 122S
Old -  and new cylinder head bolt

Tightening sequence of cylinder head bolts Volvo 122S B20B
Tightening sequence of cylinder head bolts

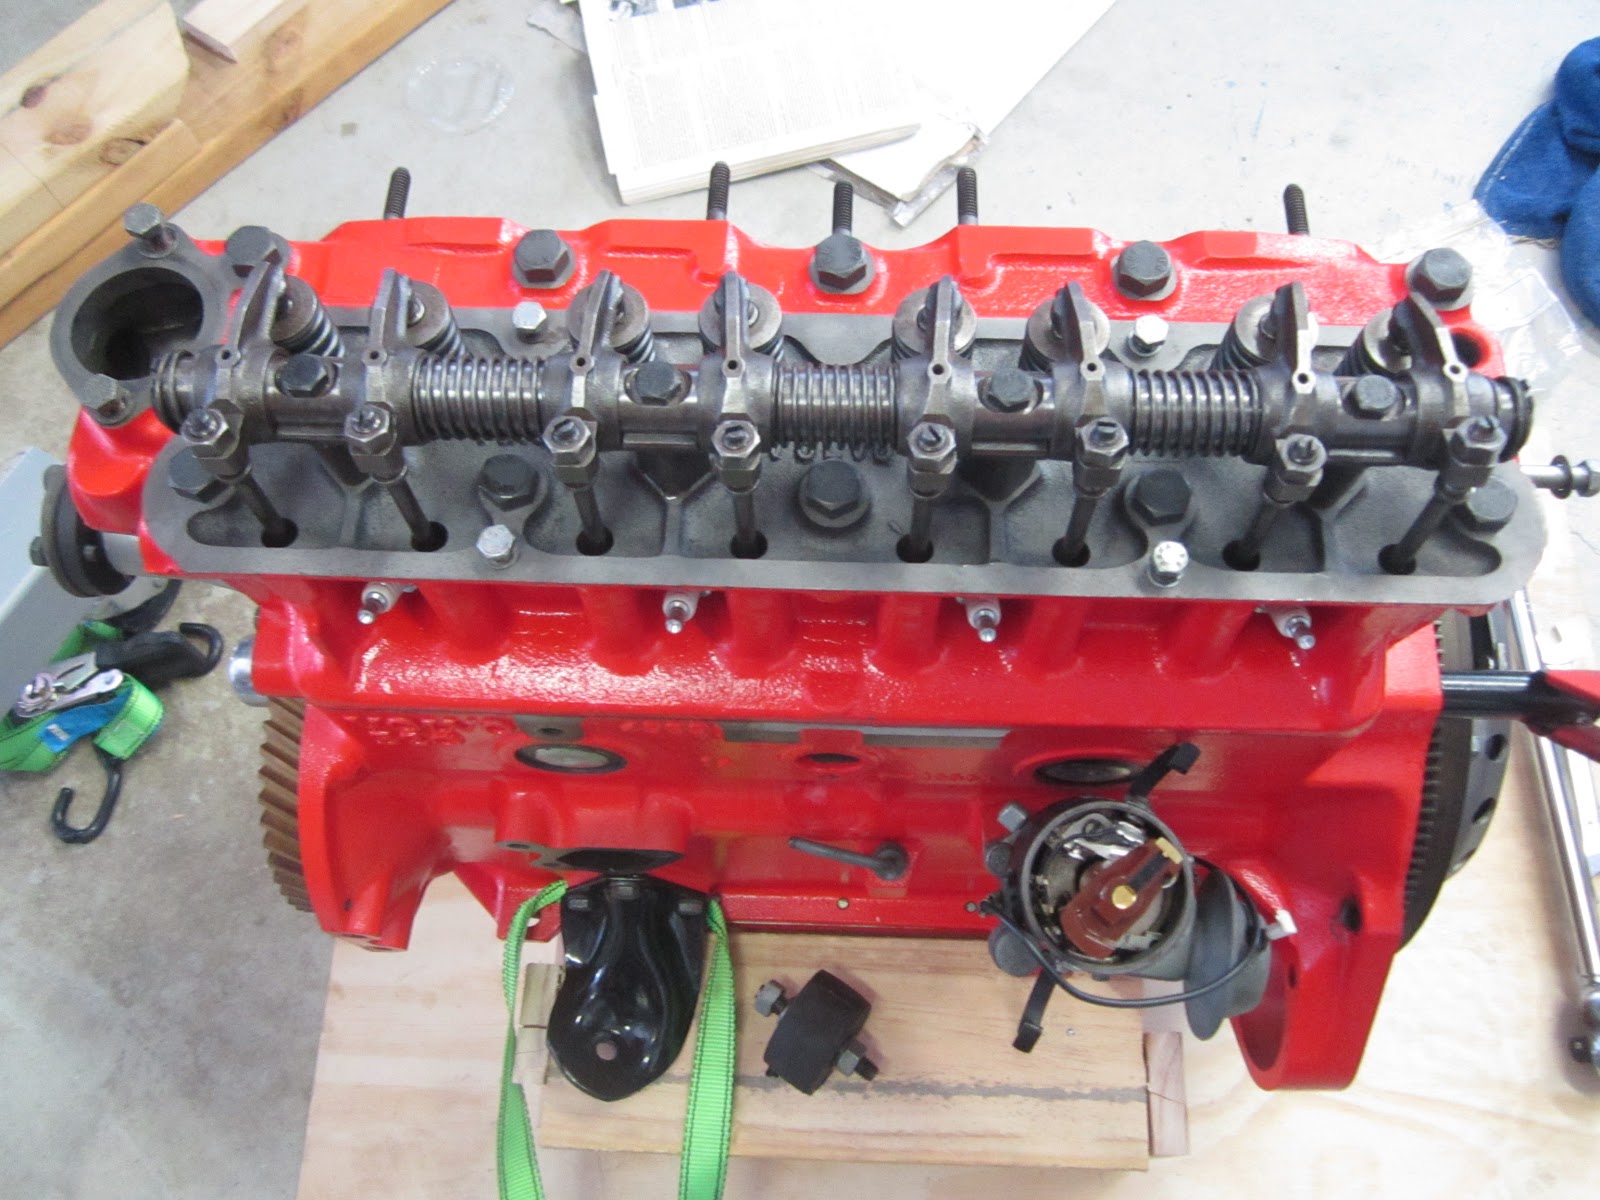
Next thing to do is fitting the pushrods on top of the tappets. The rocker shaft and arms were already assembled so after good lubrication of the shaft I fitted it to the head with a torque of 33.5 Nm.

Lubricating the inside of the rocker shaft Volvo Amazon
Lubricating the inside of the rocker shaft
Turn the arms until you see the holes in the shaft underneath

Rocker shaft bolted to the cylinder head Volvo 122S
Rocker shaft bolted to the cylinder head
According to the manual you have to tighten the cylinder head bolts to a torque of 78.5 Nm after the rocker arm assembly has been refitted. But...... as you can see 5 of the 10 bolts are underneath the rocker arm.... There are special spanners/sockets for this but they are very rare and expensive so I did it the cheap way: taking off the rocker assembly in order to tighten all the cylinder head bolts.

Example of the special Cylinder head bolt spanner Volvo 122S
Example of the special spanner (thanks  for the pic Mr Popta)

After refitting the rocker arm assembly for the second time the valve clearances have to be adjusted. The valve clearance is the gap  between the cam/pushrod and the top of the valve. For a Volvo B20B engine the clearance is 0.50 - 0.55 mm (both inlet - and outlet valves).  

Cylinder 1 in TDC --> adjust cylinder 4 valves
Cylinder 2 in TDC --> adjust cylinder 3 valves
Cylinder 3 in TDC --> adjust cylinder 2 valves
Cylinder 4 in TDC --> adjust cylinder 1 valves

* TDC = Top Dead Centre - the point that both valves are completely closed


Valve clearance adjustment Volvo Amazon 1969
Valve clearance adjustment
Rocker cover fitted Volvo B20B
Rocker cover fitted