May 12, 2013

Fitting the windows in the Volvo 122S

Fitting the windshield and rear window is a job for 2 people. You can do it alone but it's way harder.
So on a sunny Saturday morning Myk rocked up to help. First we cleaned the windows and checked which way around the rubber seals had to go.
If you take a closer look at the rubber seals you'll see one slot on the inside that goes over the body flange, one slot on the outside for the window and finally one slot on the outside for the chrome/alu trim.
The rear window was still the original one and is made of toughend glass which is stronger than the front window that was once replaced for a laminated one. We started with fitting the new rubber seal around the rear window.  Because the rear window has strong curves it was hard to keep the rubber in place so we used some masking tape. 


Fitting the rubber seal around the rear window of the Volvo Amazon
Fitting the rubber seal around the rear window

After the seal was finally in place around the window we applied Sikaflex 227 sealant between the window and the rubber seal. When fitting the window with rubber in the window frame the lip on the inside of the seal has to fall over the window flange, this is a very fiddly job but luckily there's a nice trick that will make the job a lot easier. Just take a nylon cord/washing line and put this in the slot all the way round. Leave the two ends hanging out at the center of the bottom of the window. Lift the windscreen in position and while one person is holding the window in place the other person is inside the car and is slowly pulling the string out which will pull the rubber lip over the flange. Work evenly on both sides, around 10-15 cm at a time. When the window bottom is seated the outsider can move the window so it's right in the middle of the window frame. The corners are a bit harder and you have to be really careful not to cut the rubber seal with the string. We used some thinned dishing soap to make it a bit easier. 10 minutes later the rear window was in place. 

Rear window Volvo Amazon fitted with a the help of a washing line
Rear window Volvo 122S fitted with the help of a washing line

To make sure it's water tight I laid a bead of sealant between the body and rubber seal the next day. I used some masking tape to keep the body clean and scratch free.


Masking tape to keep the body clean and scratch free

Putting Sikaflex 227 sealant between the body and rubber window seal

The front windshield was even easier to fit because it's not as round as the rear window.


Fitted windshield  with new rubber seal Volvo Amazon
Fitted windshield  with new rubber seal Volvo 122S

Fitting the side window is a bit different. I also used a string to pull the lip over the window flange. But this time I started by holding the rigid rubber seal (there's some kind of metal frame inside the rubber) on the inside of the car and pulled the string towards me while standing on the outside. 

Rigid seal side window Volvo Amazon
Rigid seal rear side window Volvo 122S

Fitting a string in the slot of the rubber window seal Volvo Amazon
Fitting a string in the slot of the window seal

Fitting seal rear side window Volvo 122S
Moving the seal in the right position

Using the trick with the washing line

Seal back in place
Seal back in place
When the rubber seal is in place it will take only a couple of minutes to put back the window with the 4 bolts and 2 screws.

Rear side window fitted - Volvo Amazon 1969
Window fitted
Done. Next thing to do is fitting the trim in the rubber seal around the windows...


Apr 27, 2013

Acrylic Lacquer Paint - Sanding - Buffing - Polishing


Because I used acrylic primer the only topcoat I could use was acrylic lacquer. That's the same as the original paint they used in the factory in Sweden. The Volvo 122S left the factory without a clear coat back in the days, so a clear coat is not necessary. The Volvo colour code for the paint is 99 (medium blue). But watch out when you order it; there are to different solid colours with code 99 for the Volvo. My Volvo is from 1969 so I took the '69-'71
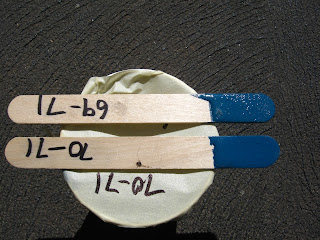
Volvo colour 99 medium blue
Two different colours coded 99 from Volvo

I used paint (330 acrylic lacquer) and special acrylic thinner from protec. The mix ratio is 1 part paint - 1.5 part thinner. So to spray the car including the engine bay, boot and dash I needed around 6 litres acrylic and 9 litres thinner. I got all my paint, spray gun, compound etc. from Lonsdale Paints. I liked this shop because those people know what there're talking about and always gave me professional info and very useful tips on how to paint.

I started with the inside of the bonnet and the boot to practice a bit. With acrylic lacquer you need to apply double header coats....A double header coat means two coats of paint, the second coat sprayed immediately after the first with no flash time in between.

I applied 3 double header coats of the thinned acrylic lacquer, allowing a 5 minute flash off between coats.

Spray painted inside of the Volvo 122S bonnet

The panels came out pretty good but after 10 minutes or so it was so misty in the booth that I couldn't see a thing...Not enough airflow and ventilation.
So I decided to spray only the interior and some smaller parts and bring the rest of the car to a prof spray painter.

side window back Volvo 122S with new coat colour 99
Right side window in blue

Dashboard Volvo 122S with new coat

Craig started spraying all the panels.

Painted panels colour 99 back in the shed - Volvo 122s Amazon 1969
Painted panels back in the shed

Two weeks later the body got it's final coat.

Volvo 122S on a trailer after painting
Volvo back home

7 coats acrylic lacquer
7 fresh coats of acrylic lacquer

With Acrylic lacquer you'll always get some orange peel (the paint finish will look like the skin of an orange).

Close up orange skin - orange peel
To get rid of the orange peel it needs to be wet sanded with 1200-1500-2000 grit followed by a buff with compound. That's why you have to put on 6-7 coats of paint; With the colour sanding, buffing and polishing you'll lose 2 coats.
Sanding with the 1200 grit will be the biggest job in the whole process because this is the part where you're sanding off all the orange peel. The 1500 and 2000 grit sanding sessions are necessary to get rid of the scratches caused by the 1200 grit.
I started sanding really careful and tried to avoid the edges of the panels. I used a soft rubber sanding block (it must have a similar softness as the mouse of your hand..) with a half sheet sand paper wrapped around it. It's really important to keep the panel you're sanding wet and to change your sandpaper regularly. If you use it too long you'll get nasty scratches caused by the build up debris in the paper. Listen carefully when sanding, if you hear a scratchy noise there's dirt between the paint and sand paper, stop sanding and clean before you continue! That's the only job I do without music.. I sanded the panels outside on the lawn because it's soft enough to put the panels on and all the water won't turn the shed into a swimming pool :)

Soft rubber sanding block
The first panel I sanded looked ok imo so I gave it a nice buff with the machine and G3. But.... All I got was a shiny orange peel look.. It needed more sanding. After a while I knew what to watch for. If you see tiny glossy spots in the sanded surface this means there's still some orange peel and the paint needs more sanding.

Sanding Acrylic Lacquer
Sanding Acrylic Lacquer - this panel needs more sanding
Panel getting flat, almost ready to buff with Farecla G3
Panel getting flat, almost ready to buff

For the buffing I used Farécla G3 and a prof. buffing machine (Rupes) with a sheepskin pad which I could borrow from Craig.


Rupes Buffing machine and Farécla G3 compound

Meguiars Cut'N Shine Sheep skin cutting pad

This Rupes is a pretty heavy machine with a powerful 900Watt 1800 rpm motor. When using it it's own weight is almost enough to do the job so don't apply to much pressure. When you apply to much pressure you can easily burn the paint and it's way harder to control the machine; it will go in all different directions and it's much harder to keep it horizontal. Also keep it moving over the paint, never hold it on one spot for more than a second, the paint will get to hot and will burn (the build up heat will turn the paint in "rubber", see pic below). Luckily I could buff this burned spot out witch some G3..

Paint burned while buffing with foam pad
Paint burned..

Avoid the edges when sanding and buffing... well uhmmm I forgot it for a second... hallo again primer. Luckily Acrylic is easy to touch up. After this and the burned paint I used the Rupes only for the bigger areas, smaller parts, corners etc can be done by hand which is a bit safer...

Sanded trough the acrylic paint... :(
Sanded trough the acrylic... :(

When using a sheep skin for buffing you'll get swirl marks in the paint. But with some Farécla G10 and a white soft foam pad on the Rupes you'll get rid of them.  The best way to inspect your sanding, buffing and polishing is to check it under a fluorescent light. It will highlight all the scratches and little imperfections. If it looks ok inside then it will look perfect outside :) !!

Swirl marks caused by buffing with a wool pad
Swirl marks caused by buffing with sheep skin

Farécla G10 and a white soft foam pad on the Rupes

Polished Boot Volvo 122S - now waiting for some wax
Polished Boot - now waiting for some wax

Roof sanded with 1200-1500-2000 grit before buffing with G3

Roof Volvo 122S after buffing with Farecla G3

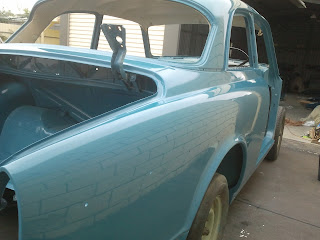
Volvo 122S body shell after buffing with Farecla G3 and G10

Close up Volvo 122S body after buffing with foam pad and Farecla G10
Close up after buffing with foam pad and Farecla G10

Now the paint has to cure for a couple of weeks (normally around 4-8 weeks after painting) before I can apply the wax and Glaze. If you put wax on paint that's to fresh the wax will seal the paint and thus trapping the solvents that are still escaping the fresh paint. I some cases it can even cause the paint to lift... So I'm happy to wait a while. Still got lots of other jobs to do on the car.


Apr 3, 2013

Little things

Sometimes after a busy day I don't have much time for the Volvo. That's when I take on one of the many little projects.

Cleaning the windshield and rear window
The front- and rear window came out with an edge covered with old hard black sealant. I tried to get rid of it with thinner, sharp knives, aceton, etc, nothing worked.
Then I remembered I still had some paint stripper left which I used on the body of the Volvo 122S. It's a gel, so it's easy to apply. I tried it on a little part, waited for 10-15 minutes and took a blunt scraper.
It worked! The sealant had turned into black butter and I could almost wipe it of with a rag. Watch out with the edge of  your windshield, especially when the edge is a bit crumbly, because the paintstripper may get between the different layers of the glass. When all the sealant was removed I hosed the windows down with water to get rid of the paint stripper.

Windshield Volvo 122S with a lot of hard old black sealant

Paint stripper gel on top of the old hard sealant

Windshield and rear window finally nice and smooth


Fixing the tail lights 
The tail lights looked a bit dull and rusty so I took 'm apart. I cleaned all the parts with hot water and a brush. The rust on the chrome bezels wasn't from the bezels but from the rusty screws. I'm gonna replace them with Stainless steel ones later.

Tail light with bezel

The chrome on the inside of the tail lights was dull or totally gone. Two coats with chrome spray made them look like new. Don't use clear on top of the chrome paint because it will make it look darker and greyish.

Painting the chromed inside of the tail lights - Volvo 122S 1969
Painting the chromed inside of the tail lights.
Right one with a coat of clear on top which I resprayed later

 Chrome sprayed inside of the tail lights - Volvo 122S
Resprayed inside of the tail lights

Tail light with bezel Volvo 122S

Wipers
Before putting back the wiper assembly I wanted to make sure that everything was working like it should be. With some inernet research and tips from my Volvo friends I tested everything on the work bench.

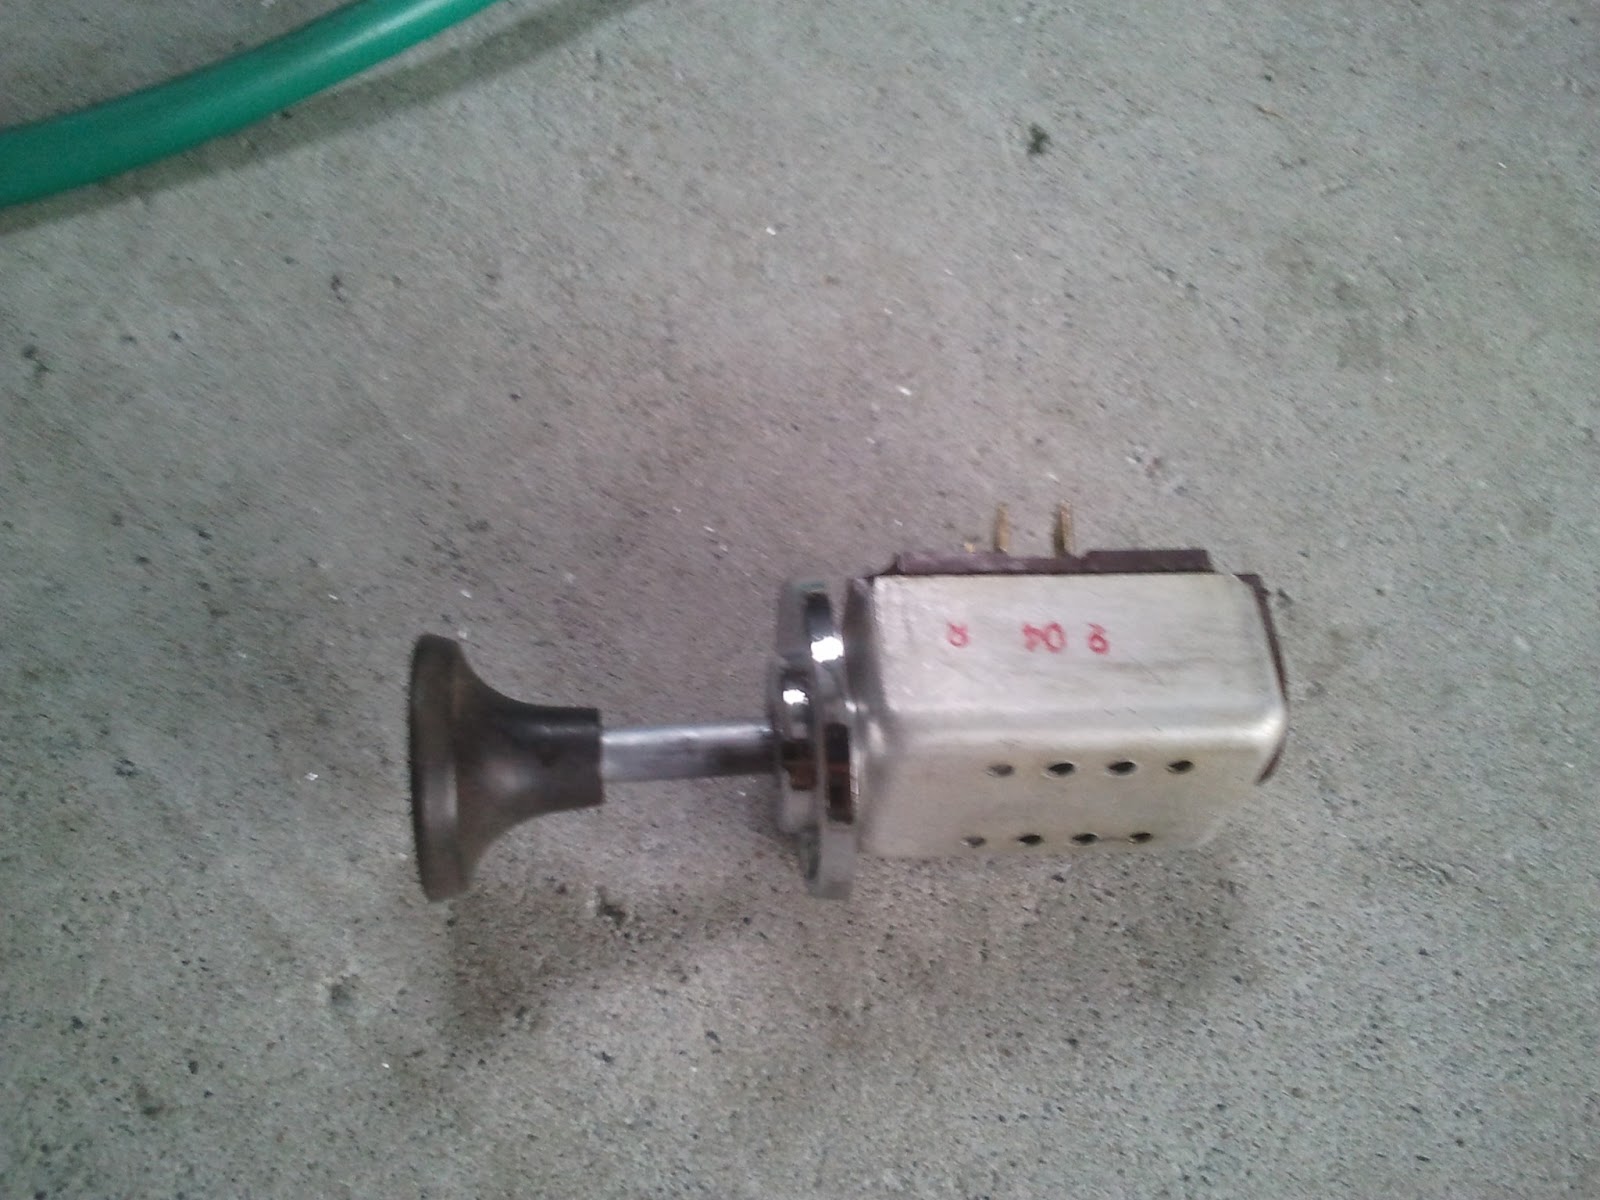
The wiper switch in the dash  has 4 positions; off, slow, fast and fast with washer.

Wiper switch Volvo Amazon 122S
Wiper switch


Wiper switch Volvo 122S has 4 positions
Wiper switch Volvo 122S - see the four  different modes

On the other side of the switch  you'll find 5 pins. 

Wiper switch Volvo 122S with 5 pins

If you take a closer look you'll see a letter next to each pin/connector :
P = green (wiper motor) and + lead from fuse box  to pos. pole battery (I tested without the fuse box  : o )
A = black (wiper motor)
F = red (wiper motor)
W = black (washer motor) (I used a brown lead in the test)
Wiper motor housing and other pin on washer motor are connected to the neg. pole of the battery.

Wiper motor Electrolux Volvo 122S 1969
Wiper motor Electrolux  - Volvo 122S 1969

Testing the wiper assembly - Volvo 122S 1969
Testing the wiper assembly

Everything worked (..of course, it's Volvo..;)

If you want more info about the different Volvo wipers, check http://www.sw-em.com/Windshield%20Wiper%20Systems.htm with lots of detailed info 


Jan 22, 2013

Acrylic Primer filler

After all the seams were sealed I started with the Acrylic Primer Filler from Carmaster (434 Protec). The instructions on the tin were ; Apply product direct from the can without thinning.
That's almost impossible!
I used a spraygun with a 2mm tip and because it looks so thick I thinned the primer with 10% thinner. The mix was still way to thick and sprayed dry. After sanding with 360-400-600 and 800 (wet) grit you could still see the results of the dry spay. It feels real smooth but still looks porous... Time for a thinner coat of primer

Porous structure of the primer

Right door with 3 coats of primer on top of the epoxy primer
Then I mixed the primer with 25-30% thinner and it came out much better, a nice wet coat. If you use less thinner it's more like a porous filler.

Smooth structure of Carmaster 434 primer after extra thinning
Smooth structure of primer after extra thinning

Boot  with 3 coats of sanded primer
Boot  with 3 coats of sanded primer  
When spraying the primer filler the first time I got a lot of dry overspray falling on the freshly painted panels which resulted in a rough surface. Sanding it back with 240 grit and applying a coat of 30%  thinned primer will smoothen the surface.

After the whole body was covered in 3 coats of primer it was time for some sanding. I sanded the bigger "flat"  parts with a Ryobi DA sander (only used the DA for the 400 grit). It's an electric sander with a 5" pad. One of the reasons I bought it was that the orbit was only 2.5 mm which is really good for finishing with 1500-2000 grit the last colour coat just before polishing but the main reason was that my compressor is just to small to feed an air driven DA sander. Don't try to wet sand with an electric sander, if you do you'll get shocking results...

One thing I learned the hard way is never to put your sander on the body when it's already on. It will go through the primer/paint straight away.

Volvo 122S Body in Carmaster 434 Protec primer
Body in high build primer

Volvo 122S sanding the Carmaster 434 primer
Sanding the primer

For all the little corners and curves I used a small piece (ca 2.5x2.5 cm) of sandpaper and sanded it by hand. I also used a flexible rubberblock. Don't sand too hard and do small areas at a time, devide a panel in smaller parts when sanding. Start with 400 grit and if it's still a bit rough sand it lightly with 320-360 grit and then continue with 400-600-800 grit. Just take your time. After 3-4 hours or so I always lost my patience without knowing it and started sanding through. That was my sign to stop . I think I spend all together over a 75 hours sanding the epoxy primer and the high build primer...

Don't try to save on sandpaper. When it's clogged take a new piece otherwise you'll get scratches caused by the build up dust in the sandpaper.
When wet sanding with 600 and 800 grit I used a plant sprayer, wrapped the paper around the flexible soft rubber block and sanded without to much pressure. After sanding a part I went over it with a clean wet rag to take of most of the debris and then dry with a clean dry towel to check the results.

Roof Volvo Amazon after wet sanding with 600 grit
Roof after wet sanding with 600 grit

Wet sanding Volvo Amazon with 600 and 800 grit
Wet sanding  body with 600 and 800 grit
When sanding the whole body I sanded through the high build- and epoxy primer a couple of times, especially in the engine bay with all the curves and hard to reach spots. I think that's inevitable. Just sand everything that has to be sanded and then touch up with epoxy primer. Don't forget to sand the epoxy primer lightly before putting on the colour coat.

After wet sanding primer with 600 grit
Roof after wet sanding primer with 600 grit

Volvo 122S roof - After wet sanding primer with 800 grit
Roof after wet sanding primer with 800 grit


Primer after wet sanding primer with 800 grit
After wet sanding primer with 800 grit - getting glossy