Dec 28, 2012

Seam sealer

One of the most important things to do when you're preparing your car for painting is sealing the seams. Most rust problems will start in seams if not sealed properly.
There're a lot of different types and brands of sealants on the market,
Never, never use a sealant with silicone in it for the simple reason you cannot paint over it.

I tried two brands; Sikaflex 227 and HB Body 115. I put a bead of both of them on an old sunroof and after letting it cure for a day I put it in the scorching sun for a couple of days. They both survived, but in my opinion the HB Body 115 has a better adhesion.

HB Body sealant en Sikaflex 227 sealant
Sealants

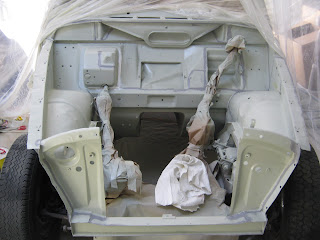
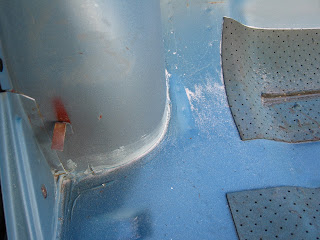
Seams sealed in engine bay

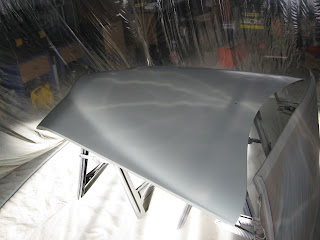
Seam sealing bonnet
Seam sealing bonnet

 Within 30 seconds after applying the sealant I dipped my finger in thinner and went over the sealant to smooth it. After all the seams were sealed I let the sealant dry for a couple of days and then brushed over it with epoxy primer.

Dec 19, 2012

Epoxy primer

I intended to use an etch primer and on top of that a HS primer. But as the Volvo was only bare metal on the outside I've heard you can get problems with etch primer going underneath the paint at the edges and it will probably lift the existing paint. Hmm.. what about epoxy primer.. it can be used on as well as bare metal and painted surfaces, doesn't absorb water and it will seal the body too.
I started looking for a epoxy primer which could also be rolled or brushed on. And I found one: 408 Epotec primer surfacer from Protec . It's a polyamide cured Epoxy primer surfacer. On top of the epoxy primer I'll use Carmaster Acrylic Primer filler, also from Protec.

Protec 2K Epoxy primer 408
Protec 2K Epoxy primer


I painted one panel with a mohair roller and brush and sprayed another to see the difference. I used ca. 10% thinner for the rolled-on epoxy mix and ca 20% with the spray epoxy primer. The panel that has been sprayed looks smoother but the rolled-on primer looks pretty good too, there's a little bit orange peel. Next time I'll use more thinner for the rolled-on mix.

Before I could spray the body and all the panels I had to build a spray booth in the shed. I used a couple of cheap plastic dropsheets as walls, masking tape and masking paper on the floor. To get rid of the water in the air I used a water trap ca. 10 m from the compressor. If you put it to close to the compressor it wouldn´t work as all the water is still steam.

Spray booth made of plastic drop sheets
Spray booth

Spray booth made of plastic drop sheets with fan

As flash rust started within minutes after cleaning  I had to sand back every panel. After sanding the roof I applied the first epoxy coat with a roller so I had more time to sand the rest of the body.

Flash rust 15 minutes after cleaning

I hang the doors with octopus straps so I was able to spray all the sides in one go. The protec epoxy primer has a flash time of ca. 10 minutes. That will give you the time to mix some new paint for the second coat. After mixing the epoxy with the hardener and the 202 reducer you have to wait for 10 minutes before you can use it.

Door with two coats epoxy primer

Bonnet in epoxy primer

Body Amazon in 2K epoxy primer

Body 122S in 2K epoxy primer
Body Amazon in 2K epoxy primer

Next thing to do is filling all the dents with bondo. I used U-Pol 0712 Dolphin body filler. It's unbelievable how many little dents showed up when the surface is glossy... especially the bonnet...

Filling the door with Dolphin bondo
Filling, the supervisor is watching..

Half way filling the dents in the bonnet
Half way filling the dents in the bonnet...


Nov 29, 2012

Blasting

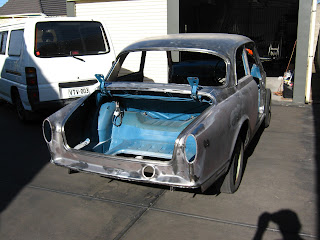
After spending almost 15 hours with the grinder I decided to bring the Volvo to a soda blaster.  Because the interior was still good the blaster only blasted the outside of the 122S.

Volvo 122S before soda blasting
Before soda blasting

Volvo 122S after soda blasting
After soda blasting

Soda blasting is better for your car than sand blasting because the soda doesn't damage the underlying metal. The only problem is that the soda doesn't remove all rust. So after the blasting it was time for some more grinding and a chemical treatment. The normal surface rust is easy to remove with the grinder but  the hood, roof and boot where "pitted".
I used phosphoric acid and Rustico to get rid of the rust pits. Not all the rust in the pits was removed by the chemicals but it went soft after the treatment and was easy to remove with the grinder without taking of too much off the healty metal.


Pitted surface of the roof Volvo 122S
Pitted surface of the roof

Boot Volvo 122S removing rust
Boot - Left side done

Boot Volvo 122S rusty pitted surface cleaned
Almost done

Soda  residue will give problems if you don't clean the metal before painting. However if you want to wait a couple of months before painting it's also a perfect rust inhibitor.
After removing the surface rust I started to get rid of all the soda dust in the car, especially inside the chassis. 
And it took alot of time...hours became days....So don't expect to get rid of the hard labour with soda blasting. There's no easy way out :-s
I used compressed air and a vacuum cleaner with a high tec (masking tape ;) attached flexible hose. With the amount of baking soda that came out of the Volvo you could easily bake cakes for the whole neighbourhood..

Cleaning Volvo 122S removing soda from soda blasting
Cleaning the 122S

CLeaning Volvo 122S removing soda from soda blasting
Baking soda everywere

Cleaning Volvo 122S removing soda with flexible hose and vacuum cleaner
Vacuum cleaner with hose extension to clean the chassis 
When all the baking soda was removed I started to clean the bare metal surface of the doors. The blaster told me to wash the car with warm water, add 5% vinegar, to neutralise the soda, then hit it with a pressure washer, then wash again with 5% vinegar water, then pressure wash again and dry immidiately with a blower or rag before flash rust starts. That's the main reason I cleaned one panel at a time instead of the whole car at once.

After cleaning it's best to hit the bare metal with an epoxy primer within 1/2  an hour, otherwise you'll get flash rust again. I didn't because I was still looking for the best epoxy primer. So there will be a little, almost invisible, flash rust on the doors. Luckely it's been very hot (35-40 C) and dry the last couple of days.
Sanding with 120 grit before priming will be neccessary, but it won't take too long.


Nov 8, 2012

Fitting cylinder head

After 13 years and a last inspection of the pistons and bores it was time to fit the cylinder head of the B20B engine. First I fitted the new water pump. The pump came with two sets of rubber rings: 1 set with a height of 8.5 mm and the other one with a height of 9.5 mm. The 8.5 mm rings are for the B20B engine which has a thinner head gasket than the B18 engine.
I lubricated the new tappets inside and out with assembly oil and put them into the bores. Be careful not to drop them in the sump...

New tappets and original pushrods Volvo B20B engine
New tappets and original pushrods

Tappets fitted in their bores Volvo 122S
Tappets fitted in their bores

After the bores and pistons were also lubricated with an overdose of oil the gasket was alined with the bolt holes and the cylinder head was placed on top of it.
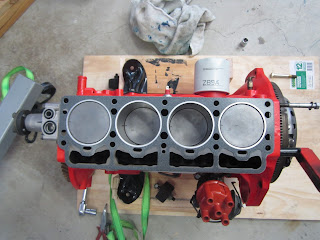
Cylinder head gasket alined with bolt holes Volvo 122S
Cylinder head gasket alined with bolt holes

"TOP" is on top of cylinder head gasket Volvo 122S B20
Make sure the word "TOP" is on top :-)

Before that I cleaned and checked all the cylinder bolt holes just by putting in the bolts and made sure they went in all the way.
The cylinder head bolts have to be tightened in a special sequence to the first torque of 39.5 Nm. There will be two more stages of thightening...

Old -  and new cylinder head bolt Volvo 122S
Old -  and new cylinder head bolt

Tightening sequence of cylinder head bolts Volvo 122S B20B
Tightening sequence of cylinder head bolts

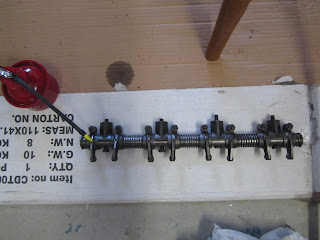
Next thing to do is fitting the pushrods on top of the tappets. The rocker shaft and arms were already assembled so after good lubrication of the shaft I fitted it to the head with a torque of 33.5 Nm.

Lubricating the inside of the rocker shaft Volvo Amazon
Lubricating the inside of the rocker shaft
Turn the arms until you see the holes in the shaft underneath

Rocker shaft bolted to the cylinder head Volvo 122S
Rocker shaft bolted to the cylinder head
According to the manual you have to tighten the cylinder head bolts to a torque of 78.5 Nm after the rocker arm assembly has been refitted. But...... as you can see 5 of the 10 bolts are underneath the rocker arm.... There are special spanners/sockets for this but they are very rare and expensive so I did it the cheap way: taking off the rocker assembly in order to tighten all the cylinder head bolts.

Example of the special Cylinder head bolt spanner Volvo 122S
Example of the special spanner (thanks  for the pic Mr Popta)

After refitting the rocker arm assembly for the second time the valve clearances have to be adjusted. The valve clearance is the gap  between the cam/pushrod and the top of the valve. For a Volvo B20B engine the clearance is 0.50 - 0.55 mm (both inlet - and outlet valves).  

Cylinder 1 in TDC --> adjust cylinder 4 valves
Cylinder 2 in TDC --> adjust cylinder 3 valves
Cylinder 3 in TDC --> adjust cylinder 2 valves
Cylinder 4 in TDC --> adjust cylinder 1 valves

* TDC = Top Dead Centre - the point that both valves are completely closed


Valve clearance adjustment Volvo Amazon 1969
Valve clearance adjustment
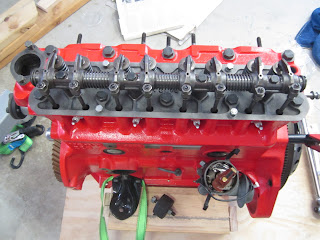
Rocker cover fitted Volvo B20B
Rocker cover fitted


Oct 20, 2012

Fitting flywheel and clutch

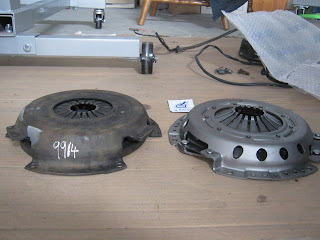
I decided to replace the whole clutch assembly  because the old clutch disc and pressure plate were totally gone.

Volvo 122s old and new Sachs clutch disc
The old and new clutch disc. See the words "gearbox side" on the new one

Volvo 122s Sachs pressure plate
Old and new Sachs pressure plate, see the worn out "fingers" on the old one

Volvo 122s new Sachs clutch assembly
New Sachs clutch assembly, incl. new thrust bearing and spline lube

First I had to take the engine off the engine stand. I used the engine crane, strapped the engine and stand with 3 ratchet tie downs to it and then removed the stand.
After balancing the engine I took the flywheel and bolted it on the crankshaft. The easiest way to do this is to keep a couple of mm distance between the crankshaft and the flywheel. This will make it easier to put in the bolts. Then I tightened the bolts to a torque of 54 Nm.To stop the flywheel from turning I used a bolt and and a big screwdriver as a wedge.

Tightening the flywheel bolts of the Volvo B20B
Tightening the flywheel bolts
Now it was time for the pressure plate and clutch disc. First I took the spline lube that came with the clutch kit and applied some of it to the centre hole of the clutch disc. When you fit the clutch disc make sure you do it right, the Sachs set I had made it easy because it was written on both sides of the disc. Before fitting the clutch assembly don't forget to degrease the flywheel, clutch disc and pressure plate.
When the pressure plate and clutch disc were lightly bolted to the flywheel you have to line up the clutch disc with the pilot bearing in the crankshaft. The easiest way to do this is using a spare gearbox shaft but because I didn't have one I used the whole gearbox to line up.

Lining up the clutch disc and pilot bearing
Lining up the clutch disc and pilot bearing with the gearbox

Lining up the clutch disc and pilot bearing with the gearbox

Lining up the clutch disc and pilot bearing - Close up

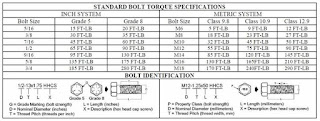
When the shaft is in the pilotbearing and clutch disc they are automatically lined up. According to the Haynes manual you have to tighten the bolts securely..... What's securely ? I found a nice table with standard torque settings which you can use when no torque setting is given in the manual. 

table with standard torque settings
1Ft lb = 1.356 Nm = 0.1883 kg fm = 12 lb in

I used a torque of 24 Nm to secure the pressure plate -flywheel bolts. When the bolts were secured I took off the gearbox. 

Sachs clutch disc and pilot bearing are lined up nicely
Hard to catch on a pic but the clutch disc and pilot bearing are lined up nicely


Oct 2, 2012

Fitting new freeze plugs and pilot bearing crankshaft


When the engine took a chemical bath all the old freeze plugs were damaged. Fitting new freeze plugs is a simple matter when the engine is out of the car. That's what I thought...

Here is how I did it:
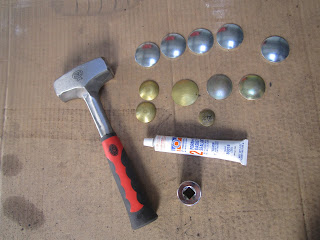
- clean the plugs and plug holes with alcohol or some solvent
- apply some liquid gasket on the edge of the plugs
- put the plug in the hole, flush with the engine
- take a socket just a bit smaller then the plug and put it with the solid side on top of the plug
- hit it one or two times with a heavy hammer to put the plug in the correct position
- take a ball-pein hammer and put it with the ball on the plug
- hit it one or two times with a heavy hammer
- apply liquid gasket on the edge of the plugs


Freeze plugs Volvo 122S B20B
Liquid gasket - Permatex Gasket Sealant 2 - on the core plugs
Liquid gasket - Permatex Gasket Sealant 2 - on the freeze plugs

Left plug ready to hit, right plug already in

Freeze plugs fitted in the Volvo B20B engine block
Grinding the el cheapo ball-pein hammer
When I hit the plugs with the ball-pein hammer it seemed that the ball was too pointy, which resulted in not so nice dents in the plugs. I took the el cheapo ball hammer put it on the bench and made it nice round with the grinder. Then the plugs were hit again. Next time I'll use a bigger and better quality ball-pein hammer...

Freeze plugs fitted in the Volvo B20B engine block
Freeze plugs hammered in the Volvo B20B engine block 
Freeze plugs fitted in the Volvo B20B engine head
Freeze plugs fitted in the Volvo B20B engine block
I also put in the plug at the rear end of the camshaft. It's a good idea to do this after you place the camshaft so you don't push it out accidently.

Camshaft plug at rear of engine Volvo 122S B20B
Fingers crossed I hit them hard enough and they won't leak or fall out. Especially the camshaft plug which is unreachable when the engine is back in the bay.

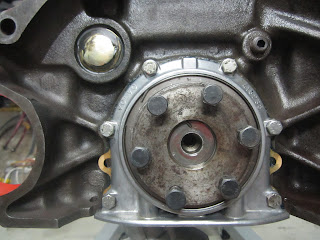
While the engine was still off the engine stand I also fitted the new pilot bearing in the crankshaft. With a 1 inch socket it was tapped in place.

New crankshaft pilot bearing, cover plate and spring Volvo 122S B20B

Volvo B20B crankshaft ready for thre ne pilot bearing
Volvo B20B crankshaft ready for the new pilot bearing

Pilot bearing in place

pilot bearing crankshaft Volvo 122S B20B
Done