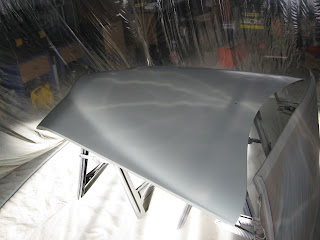
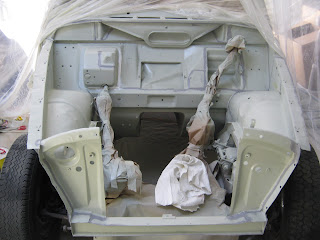
I intended to use an etch primer and on top of that a HS primer. But as the Volvo was only bare metal on the outside I've heard you can get problems with etch primer going underneath the paint at the edges and it will probably lift the existing paint. Hmm.. what about epoxy primer.. it can be used on as well as bare metal and painted surfaces, doesn't absorb water and it will seal the body too.
I started looking for a epoxy primer which could also be rolled or brushed on. And I found one: 408 Epotec primer surfacer from
Protec . It's a polyamide cured Epoxy primer surfacer. On top of the epoxy primer I'll use Carmaster Acrylic Primer filler, also from Protec.
 |
| Protec 2K Epoxy primer |
I painted one panel with a mohair roller and brush and sprayed another to see the difference. I used ca. 10% thinner for the rolled-on epoxy mix and ca 20% with the spray epoxy primer. The panel that has been sprayed looks smoother but the rolled-on primer looks pretty good too, there's a little bit orange peel. Next time I'll use more thinner for the rolled-on mix.
Before I could spray the body and all the panels I had to build a spray booth in the shed. I used a couple of cheap plastic dropsheets as walls, masking tape and masking paper on the floor. To get rid of the water in the air I used a water trap ca. 10 m from the compressor. If you put it to close to the compressor it wouldn´t work as all the water is still steam.
 |
| Spray booth |
 |
| Spray booth made of plastic drop sheets with fan |
As flash rust started within minutes after cleaning I had to sand back every panel. After sanding the roof I applied the first epoxy coat with a roller so I had more time to sand the rest of the body.
 |
| Flash rust 15 minutes after cleaning |
I hang the doors with octopus straps so I was able to spray all the sides in one go. The protec epoxy primer has a flash time of ca. 10 minutes. That will give you the time to mix some new paint for the second coat. After mixing the epoxy with the hardener and the 202 reducer you have to wait for 10 minutes before you can use it.
 |
| Door with two coats epoxy primer |
 |
| Bonnet in epoxy primer |
 |
| Body Amazon in 2K epoxy primer |
 |
| Body Amazon in 2K epoxy primer |
Next thing to do is filling all the dents with bondo. I used U-Pol 0712 Dolphin body filler. It's unbelievable how many little dents showed up when the surface is glossy... especially the bonnet...
 |
| Filling, the supervisor is watching.. |
 |
| Half way filling the dents in the bonnet... |


