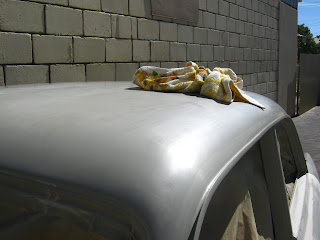
After all the seams were sealed I started with the Acrylic Primer Filler from Carmaster (434 Protec). The instructions on the tin were ; Apply product direct from the can without thinning.
That's almost impossible!
I used a spraygun with a 2mm tip and because it looks so thick I thinned the primer with 10% thinner. The mix was still way to thick and sprayed dry. After sanding with 360-400-600 and 800 (wet) grit you could still see the results of the dry spay. It feels real smooth but still looks porous... Time for a thinner coat of primer
 |
| Porous structure of the primer |
 |
| Right door with 3 coats of primer on top of the epoxy primer |
Then I mixed the primer with 25-30% thinner and it came out much better, a nice wet coat. If you use less thinner it's more like a porous filler.
 |
| Smooth structure of primer after extra thinning |
 |
| Boot with 3 coats of sanded primer |
When spraying the primer filler the first time I got a lot of dry overspray falling on the freshly painted panels which resulted in a rough surface. Sanding it back with 240 grit and applying a coat of 30% thinned primer will smoothen the surface.
After the whole body was covered in 3 coats of primer it was time for some sanding. I sanded the bigger "flat" parts with a Ryobi DA sander (only used the DA for the 400 grit). It's an electric sander with a 5" pad. One of the reasons I bought it was that the orbit was only 2.5 mm which is really good for finishing with 1500-2000 grit the last colour coat just before polishing but the main reason was that my compressor is just to small to feed an air driven DA sander. Don't try to wet sand with an electric sander, if you do you'll get shocking results...
One thing I learned the hard way is never to put your sander on the body when it's already on. It will go through the primer/paint straight away.
 |
| Body in high build primer |
 |
| Sanding the primer |
For all the little corners and curves I used a small piece (ca 2.5x2.5 cm) of sandpaper and sanded it by hand. I also used a flexible rubberblock. Don't sand too hard and do small areas at a time, devide a panel in smaller parts when sanding. Start with 400 grit and if it's still a bit rough sand it lightly with 320-360 grit and then continue with 400-600-800 grit. Just take your time. After 3-4 hours or so I always lost my patience without knowing it and started sanding through. That was my sign to stop . I think I spend all together over a 75 hours sanding the epoxy primer and the high build primer...
Don't try to save on sandpaper. When it's clogged take a new piece otherwise you'll get scratches caused by the build up dust in the sandpaper.
When wet sanding with 600 and 800 grit I used a plant sprayer, wrapped the paper around the flexible soft rubber block and sanded without to much pressure. After sanding a part I went over it with a clean wet rag to take of most of the debris and then dry with a clean dry towel to check the results.
 |
| Roof after wet sanding with 600 grit |
 |
| Wet sanding body with 600 and 800 grit |
When sanding the whole body I sanded through the high build-
and epoxy primer a couple of times, especially in the engine bay with all the curves and hard to reach spots. I think that's inevitable. Just sand everything that has to be sanded and then touch up with epoxy primer. Don't forget to sand the epoxy primer lightly before putting on the colour coat.
 |
| Roof after wet sanding primer with 600 grit |
 |
| Roof after wet sanding primer with 800 grit |
 |
| After wet sanding primer with 800 grit - getting glossy |


